 Screenshot_20240520-175104.png
How to get your vacation spot's weather with Home Assistant
A stellar privacy-preserving setup that gets you the features of mediocre apps that track you, without any tracking at all.
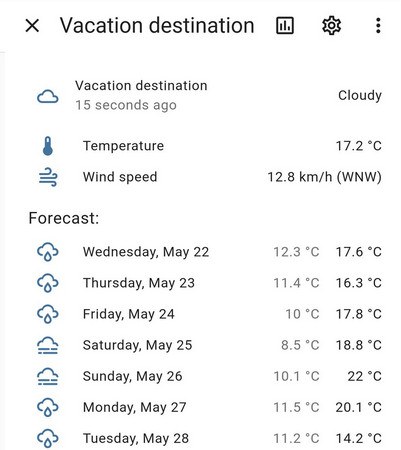
While on vacation, we tend to plan our activities around the weather, so that we don't have to "enjoy" a surprise shower or snowfall. For this purpose there exist a myriad of free phone apps you can install — with the caveat that these apps often show intrusive ads, sell your private data, and track your whereabouts. They also don't allow you to conveniently check the weather in the past, because they don't save weather records locally.
What if preparing for vacation didn't have to be this way?
What if you could have your own Home Assistant move a "vacation spot" around with you, so up-to-date weather follows you when appropriate wherever you go on vacation?
It turns out you can. And here's how you do it, step by step.
A way for you to stay in touch with your Home Assistant setup
For this trick to work, your phone Companion app must keep a connection to your Home Assistant instance, so that location can be periodically sent by your phone to your Home Assistant setup.
The most expedient way to do this is to simply pay Nabu Casa the $5/mo they ask for. It's a great service, for less than the price of a large beer in most of the Western world. When you use this service, nothing else needs to be set up.
Alternatively, you could look into setting up a VPN service to your Home Assistant. I'm on this boat for a variety of reasons, and I can confirm it works fine. If you go through this route, make sure to set persistent connection to always on in your Companion app's server settings.
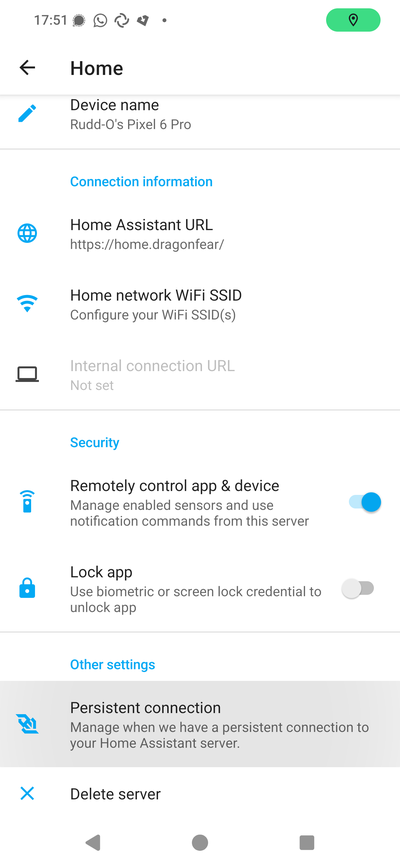
Either way, ensure you can use Home Assistant via the companion app, both at home and when you're connected via a cellular data connection.
The vacation mode
You'll need a binary sensor or switch — often, as is my case, an input boolean — that lets you signal to Home Assistant that you have gone on vacation.
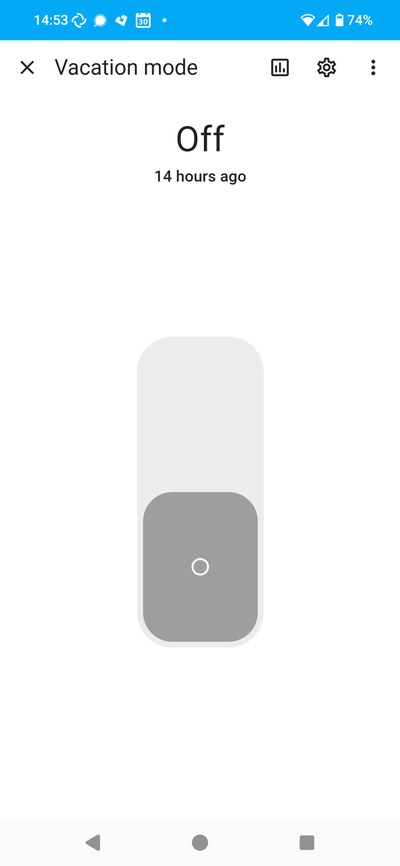
This info is actually very useful for other purposes — for one, it lets you power all your smart devices off when you go away for vacation.
Some people use their alarm system's Vacation mode as a signal for their vacation automations. For example, Alarmo users have an Arm vacation setting they can kick on, in order to set up their home security system appropriately for a vacation.
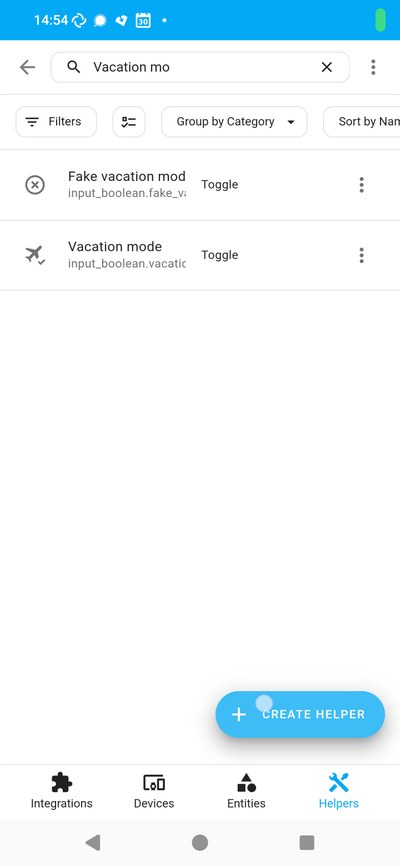
If you don't already have a sensor or toggle to enable vacation mode, create an input toggle through the Helpers tab under Devices and Services settings.
Your location
Enable background location reports in the Manage sensors section of your Companion phone app configuration.
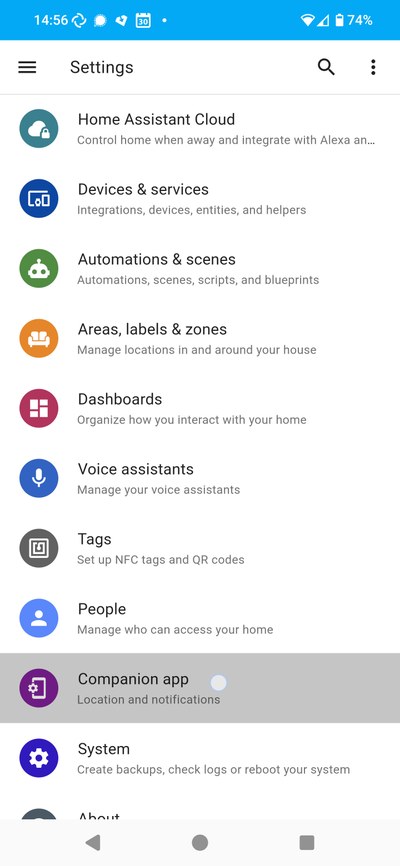
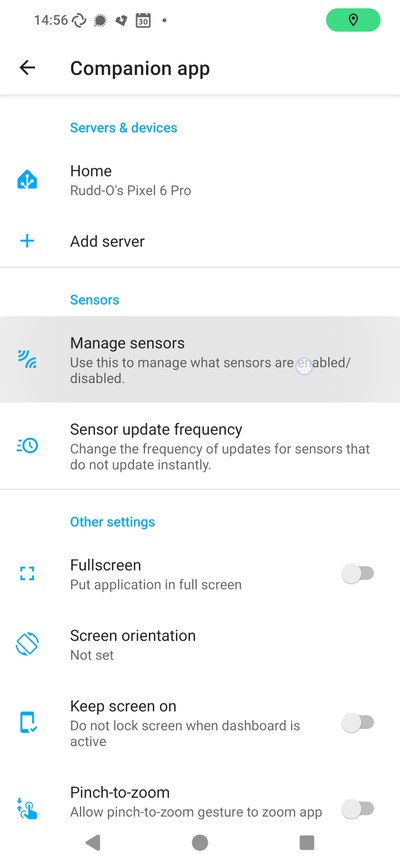
Have the sensor send periodic updates (they don't need to be frequent!).
This should create a device_tracker entity associated to your phone, and populate it with your location (whose contents will usually say Home or Not Home). Confirm that the device tracker has latitude and longitude attributes. You can do this on the entity's info dialog by searching for the name of the sensor. The Attributes section should show latitude and longitude:
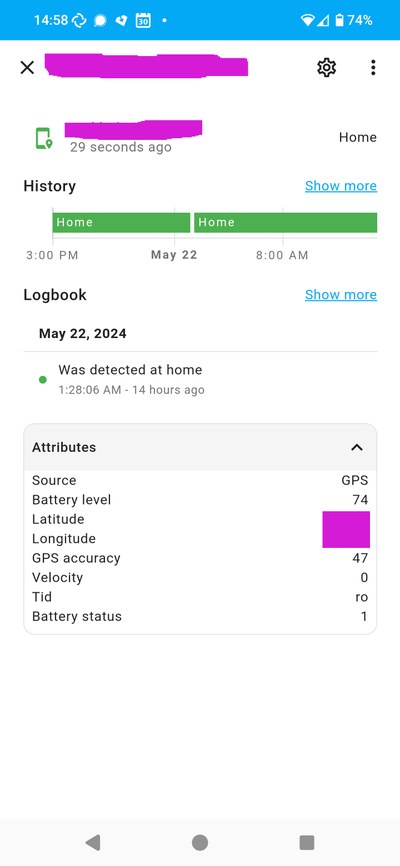
Now your Home Assistant will get periodic reports of your location, and this will work without leaking that location to anyone else.
This is all you need on the bare Home Assistant and Companion sides of the setup.
A vacation zone
Under the Settings page, you'll find Areas and Zones. In the Zones tab, create a zone called Vacation destination.
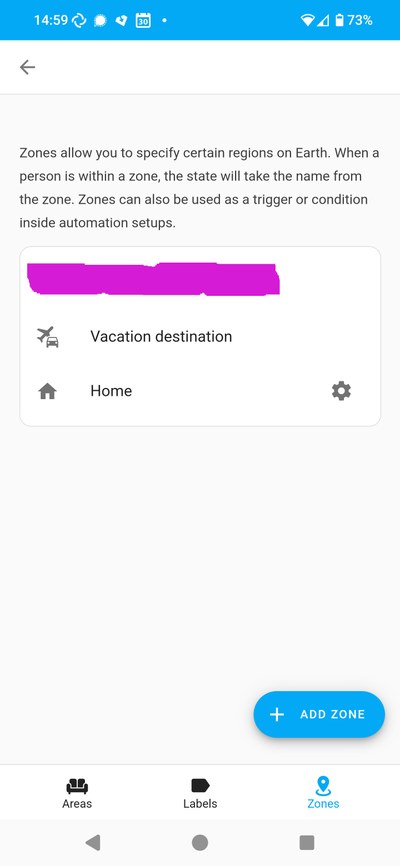
You don't need to set its latitude or longitude to anything just yet, but be sure to set up the radius to something preposterous like 5000 meters.
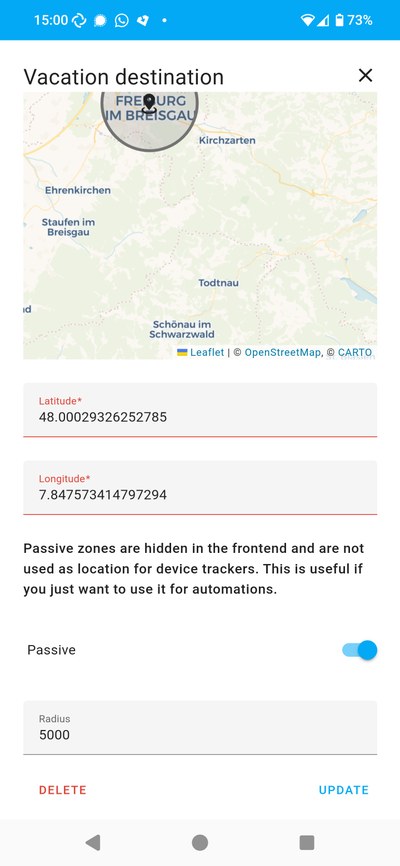
Enable the Passive toggle — otherwise Home Assistant will think you are always on vacation, which will screw with your other presence automations.
The Spook! Your Homie integration
Now you'll add to your Home Assistant an integration called Spook. This integration adds a bunch of functionality to Home Assistant that is not present by default; we'll need it because it can help you "move a zone", which cannot be done under a bare Home Assistant setup.
Go to the HACS section on the sidebar, click on Integrations, then select the Explore & download repositories button in the bottom right corner; finally, search for Spook. Install it and restart Home Assistant.
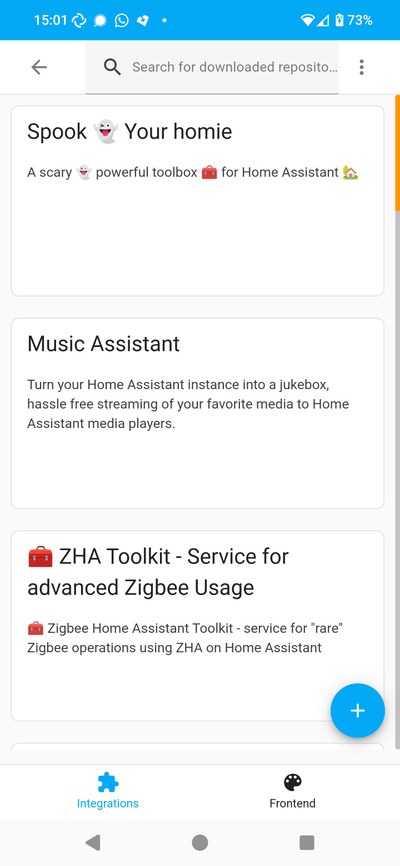
The weather at your vacation spot
Under the Devices and services settings section, add a new weather integration. We are going for the Open-Meteo integration here, since it has decent worldwide coverage and it supports looking up the weather of a zone, but you can choose whichever weather integration you trust most, as long as it determines its location from a Home Assistant zone.
When you add the new weather integration, it will ask you for a zone, where you'll select the Vacation destination zone you created earlier.
My recommendation is that you name this weather entity after the same name you gave your vacation spot.
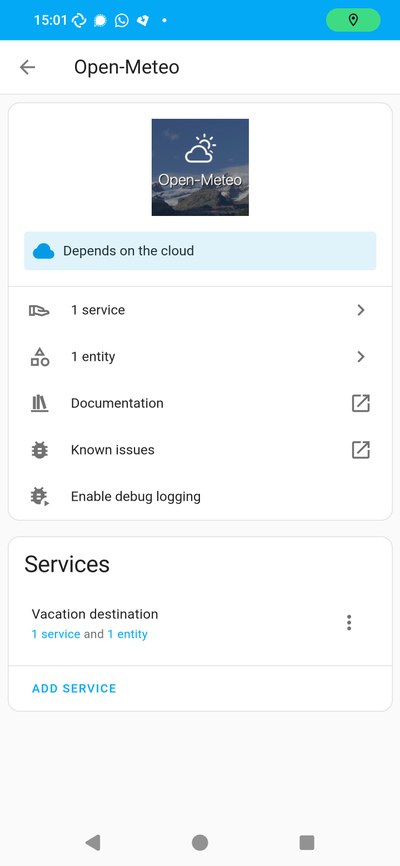
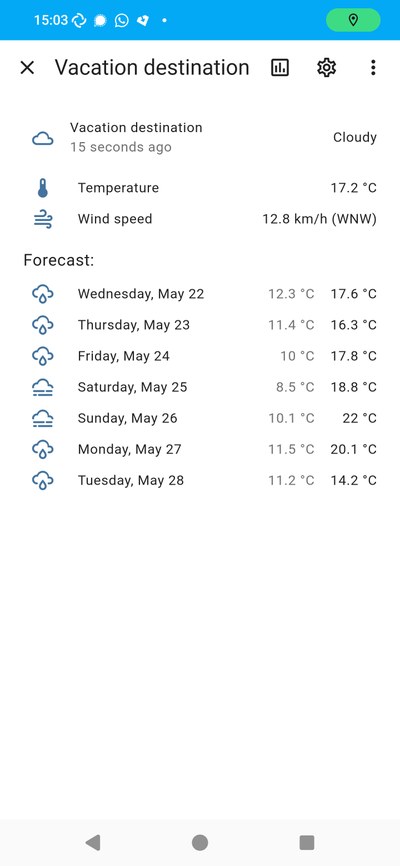
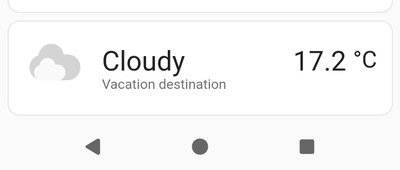
Here is how the OpenMeteo integration listing (accessible under Devices and Services) looks after the setup, as well as the respective weather entity it creates:
The automation to mate it all together
The final step is to actually move the vacation spot when your device tracker's location updates.
Here is a sample automation you can copy as YAML into a brand new automation you create. The automation toggles on the weather entity when you are on vacation, turns it off when you are back, and moves the zone that the weather entity uses when you move. You can paste the following code on the YAML editor of the automation you create:
# Sample automation
alias: Manage vacation zone
description: ""
trigger:
  - platform: state
    id: moved
    entity_id: device_tracker.your_phone_mobile_app
  - platform: state
    entity_id:
      - input_boolean.vacation_mode
    to: "on"
    from: "off"
    id: vacation-enabled
  - platform: state
    entity_id:
      - input_boolean.vacation_mode
    to: "off"
    from: "on"
    id: vacation-disabled
condition: []
action:
  - choose:
      - conditions:
          - condition: trigger
            id:
              - moved
          - condition: state
            entity_id: input_boolean.vacation_mode
            state: "on"
        sequence:
          - delay:
              hours: 0
              minutes: 10
              seconds: 0
              milliseconds: 0
          - service: zone.update
            metadata: {}
            data:
              entity_id: zone.vacation_destination
              latitude: |
                {{ trigger.to_state.attributes['latitude'] }}
              longitude: |
                {{ trigger.to_state.attributes['longitude'] }}
            alias: Update vacation zone
      - conditions:
          - condition: trigger
            id:
              - vacation-enabled
        sequence:
          - service: homeassistant.enable_config_entry
            data:
              config_entry_id: 8424bdd6a7a8f346286327768bdaa75d
      - conditions:
          - condition: trigger
            id:
              - vacation-disabled
        sequence:
          - service: homeassistant.disable_config_entry
            data:
              config_entry_id: 8424bdd6a7a8f346286327768bdaa75d
mode: restart
You'll need to change the following items:
device_tracker.your_phone_mobile_appshould be changed to the device tracker entity associated to your phone that contains thelatitudeandlongitudeattributes.input_boolean.vacation_modeshould be set to which ever entity signals that you are on vacation, and its desired state should be eitheronor changed to whichever value it has when you are on vacation.zone.vacation_destinationshould be changed to whichever zone entity ID you designated as your vacation zone.- The configuration entry ID for the Open-Meteo weather integration you added before.
- Switch your editor from YAML to visual, and then select the Vacation destination config entry in the drop down.
- You have to make this change in two different actions under the corresponding different choices.
Et voilà! You now have a zone whose movement periodically updates, which in turn causes the weather to update (again, periodically) to whichever latitude and longitude the zone finds itself in.
A visualization of the vacation weather on your dashboard
Here is a sample of a dashboard element that you can add to your dashboard. The card will only appear when you are on vacation, and stay hidden otherwise.
Here is the code for that card:
# Sample dashboard card
type: conditional
conditions:
  - condition: state
    entity: weather.vacation_destination
    state_not: unavailable
card:
  show_current: true
  show_forecast: true
  type: weather-forecast
  entity: weather.vacation_destination
  forecast_type: daily
There are more beautiful weather cards you can try instead of the built-in weather card, such as the amazing Clock Weather Card available for installation through HACS.
And that's it! Now, when you go on vacation, simply toggle Vacation mode on, and the automation takes care of retrieving the weather wherever you go. When you come back home, turn Vacation mode off — or have an automation turn it off for you — and the whole system goes dormant.
Enjoy!
 Screenshot_20240520-175104.png
 Vacation mode toggle.jpg
 How to add vacation mode toggle.jpg
 Accessing companion settings.jpg
 Accessing manage sensors of the companion app.jpg
 Zones screen.jpg
 Vacation destination zone.jpg
 Spook installed.jpg
 Open-Meteo integration config entry list.jpg
 Weather tile.jpg
 Weather tile expanded.jpg

